Friday, June 29, 2012

CATastrophic Flight!

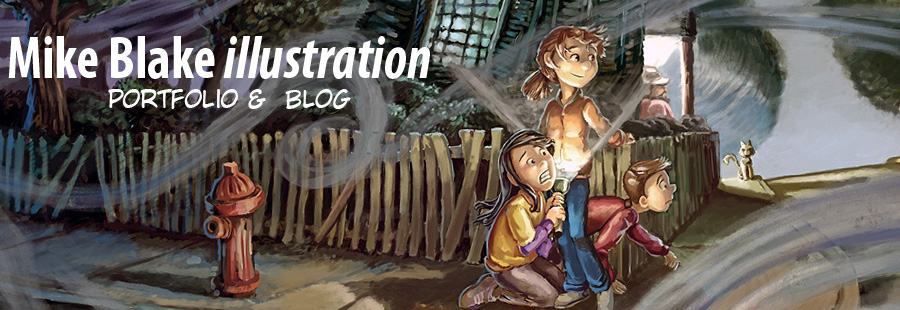
CATastrophic Flight. 2012 Digital and Graphite.

It's times like these, I am glad to be an illustrator. It's times like these, that make all the struggles worth it! In my oppinion, this is what illustration is all about...illustrations like this one. It was very REFRESHing.

For this painting I did a few things different...
Draw/Erase type 2*: Memory Impressions. Basically you find a piece of the drawing that bothers you, erase it completely, while remembering how it looked and where the lines were located, then you draw your impression of how it SHOULD look. Repeat 100 times.
Draw/Erase type 2 relies heavily on a 
basic/rough thumbnail...
otherwise you might lose yourself 
by not seeing the forest
through the trees.
Color: Painted directly with color instead of greyscale-to-color. I made a light(almost pastelic) color base (exploring options for color) then photoshop modify colors. Then go in and start painting. At first paint behind the lines(painting for real)...once the colors and shadows and everything else is pretty comitted, start painting over lines.

Brush: my cream brush was set on 100% flow instead of 10-15%. honestly I think I prefer it at 100....

*Draw/Erase type 1: Vague Impresssions. .I draw something generally and as I get more and more specific I occasionally and carefully erase ALL of the cold hard LINES in order to make them general again.

Wednesday, June 27, 2012

IF-Space


Well it seems that I've been a role the past few weeks on submitting to Illustration friday.  This post however is special...It was pointed out by a trusted friend, that my last few posts were less than my potential. I think part of it was I was trying to focus on economical line, but the truth of it is...I didn't caress the undersketch so that everything fit and was SOLID.

Regarding this illustration it was a combination of my newer methods and my older methods. I completed a detailed sketch, scanned it, redrew the girl on a new layer and left the BG alone.  After workin and working I eventually painted a bit over the pencil of the BG.

Wednesday, June 20, 2012

IF- Secret


If you couldn't tell I've been exploring and learning alot with hair...and girls are so much fun showing that off!

PROCESS:


Step1: Pre-Sketch 
      (Created using my DRAW/ERASE method.)
Step2: Finalize Lines.
Step3: Bold Value. 
      (Instead of slowly building up value, you just throw it down!)
Step4: Crisp Value 
      (Simplify and solidify all values into crisp shapes. No gradients)
Step5: Blend/smooth 
       (This is where the magic occurs...You smooth out the harsh traistions and often redefine the structure alltogether. With this step I created a temp layer above my main one and paint until you are about to paint over where you've already painted...then you merge it down and make a new layer above it. Keeps things clean and natural looking. See below for a screenshot of my layers...)
Step6: Finalize
     (This typical step is where you throw everything in the book at it. Warp, auto features, repaint areas, etc. Basically until it FEELS right.)


Basic Layer breakdown:
I thought it would be neat to show the basic structure I used with my layers to create this illustration.... except for the LINES layer set on multiply, I worked traditionally...from ground up.


Dont forget to check out my online comic/story: MAKE IT RAIN


Wednesday, June 13, 2012

Warm up painting? (...and process!)


So I began this as a quick warmup and ended up spending 3+ hours on it. It was an interesting experiment, but I took alot of risks in order to make it work (even with using direct photo reference.) I will stick with my typical greyscale-to-color for now.  Besides it would take ALOT of effort to make this work on a full blown illustration.

Process:
FINAL LINES: Basically I began with a photo reference, sketched it a few times (until I knew the essentials), and then redrew it from memory (only refering to the photo occasionally.) I also utilized my DRAW-ERASE method (see last few blog posts for explanation) to get my final lines.

COLOR BASE: Next, instead of doing a greyscale painting, I began with a color base, with bold shadows (which I feathered down later in the FINAL stage.) For the sake of experimenting I extracted my dark base colors from my photo reference, altered them to work, and then changed them even more with photoshop's settings.  Next I added the next value of color using my own methods with photoshop color-theory. (Basically you would barely recognize the photo in connection with this illustration.  I have idealized, stylized, and simplified all of it. Which, is JUST the way I like it.)

FINAL: Finally I painted, adjusted everything multiple times, threw in a dozen or so cheap tricks, painted some more...until I was either too tired of working on this, or felt somewhat satisfied with the results (as much as I could be for a WARMP-up painting. X_x haha!)


Saturday, June 09, 2012

IF- Shiny


"Lost and in the middle of nowhere without signal. Sigh..."

First I want to say about my process for this piece:
 I used my DRAW/ERASE method...however I spent more time finessing the final linework than normal.  Lines seem to be my strength (in comparison to render, render, render.)  For the painting part I did, ONE BRUSH STROKE AS LONG AS YOU CAN. For example I started the face out with a base value, picking a lighter shade I difine the features of the face with one LONG brushstroke (making sure not to let go.) Then with a lighter value I go in and do one brushtroke again. Basically alot of washes! (Avoid the choppy brush, brush, brushing that I normally do.)


Second I would like to say that I am several weeks into my personal project, "Make it Rain"!
Make it rain is a comic/story that I am illustrating and making available to everyone for free. Today I finished the 4th panel. I am excited for next week, because words are going to start! (WOOT!)
SO go take a look:    http://monisawa-makeitrain.blogspot.com/

Tuesday, June 05, 2012

The Angry Mob In My Back Pocket!

Did you ever wish you could gather together an instant mob to intimidate someone? Well, I have...in fact I've threatened my good friend Amelia in the past several times, and now it is here! The bloodhounds have been set loose and she better start running!

Regardless, I had fun making this sketch!  not only were all the characters fun to draw and come up with, but it was a great opportunity to test out my new draw/erase method.
DRAW/ERASE METHOD: For a simple explanation...I draw something generally and as I get more and more specific I occasionally and carefully erase the cold hard LINES in order to make them general again.
By doing this I ensure a drawing that is cohesive (all the people fit, are proportionate, and are actually standing on ground, etc), and it leaves room for creative development (as I see things in the vagueness that I never would've seen through my cold hard lines.) It's fun, you should try it!